Managing a Droplet
Prerequisites
Before continuing with any of the following steps, make sure that you have created an account on DigitalOcean and have already created a Droplet. If you have not yet created a Droplet, see the “Creating a Droplet” page to find out how to do so.
Navigating to the Droplet
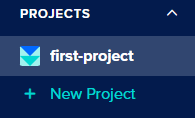
To begin learning how to manage a DigitalOcean Droplet, select the “Projects” dropdown in the top left of the main dashboard page and click on the project in which the Droplet you want to manage is located:
You will then be taken to the project’s dashboard, where you can see resources and activity and manage the project’s settings. Click on the resources tab and select the Droplet from the list below:

*Note: The full name of the project, Droplet, and the full IP address of the Droplet shown are blurred for security purposes.
Droplet Dashboard
After navigating to the Droplet, you will be greated by the Droplet’s dashboard, as seen below:
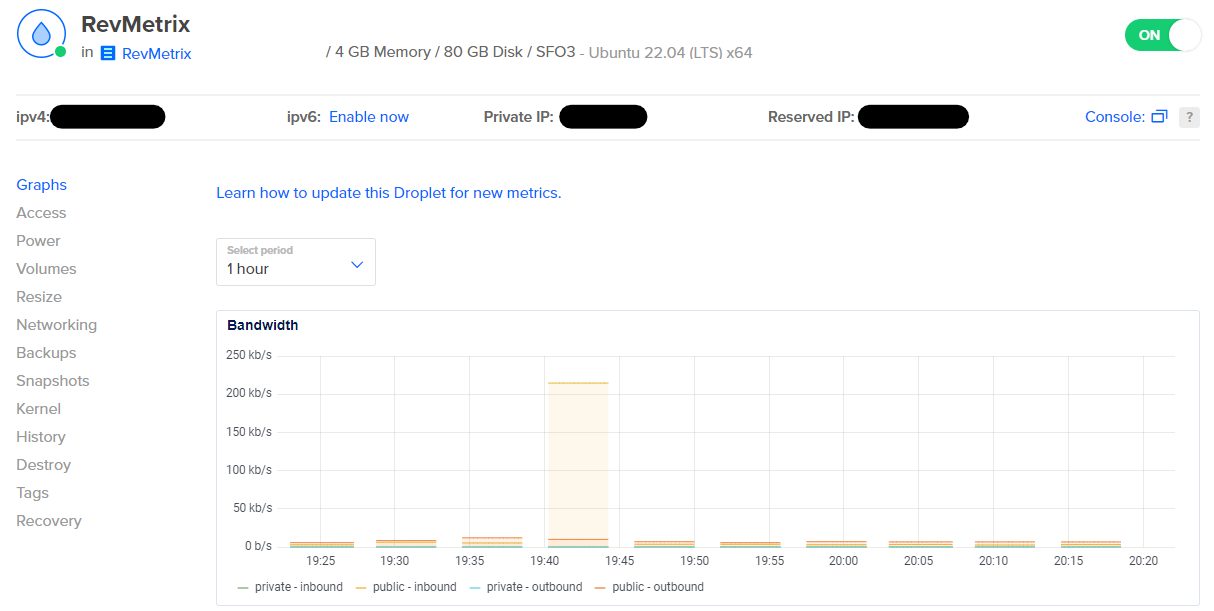
From here, you can view and manage a plethora of different things regarding the Droplet, including:
| Tabs | Details |
|---|---|
| Graphs | Graphical data that shows bandwidth, CPU usage, and disk I/O operations |
| Access | Access to the Droplet console, Recovery console, and reset the root password |
| Power | Turn off the Droplet or Power Cycle the Droplet |
| Volumes | Add or manage disk volumes on the Droplet |
| Resize | Upgrade the Droplet Type and CPU Options of the Droplet |
| Networking | View details of the Public and Private Networks and manage Inbound and Outbound Firewalls |
| Backups | Create backups of the Droplet (priced per month by size of Droplet) |
| Snapshots | Take a snapshot and manage previous snapshots taken of the Droplet |
| Kernel | View the status of the Kernel or enable management of it in the control panel |
| History | View all previous changes made to the current Droplet |
| Destroy | Destroy or Rebuild the current Droplet (only used to get rid of the Droplet completely) |
| Tags | Manage tags assigned to the Droplet (tags are used for grouping Droplets and are not required) |
| Recovery | Select whether to Boot from ISO or Boot from Harddrive (used if corruption in Droplet occurs) |
Seeing as only a handful of these tabs are necessary to use, we’ll only cover the basics throughout the rest of the steps. If more information is desired on the other tabs, finish the rest of the steps and play around inside of the Droplet’s dashboard to gain a better understanding of just what you can do to/with the Droplet from within each tab.
*Note: All IP addresses associated with this Droplet have been crossed out for security purposes.
Access
The access tab is the most important out of the list, as it allows the user to log into the Droplet console and Recovery console, along with giving them the ability to change the password of the “root” user. Below you will find information regarding each of the access tab’s functions.
Droplet Console
The Droplet console is what the user will use to access their Droplet, make changes, and perform any modifications/operations inside of the Droplet. Pictured below is the form for signing into the console:
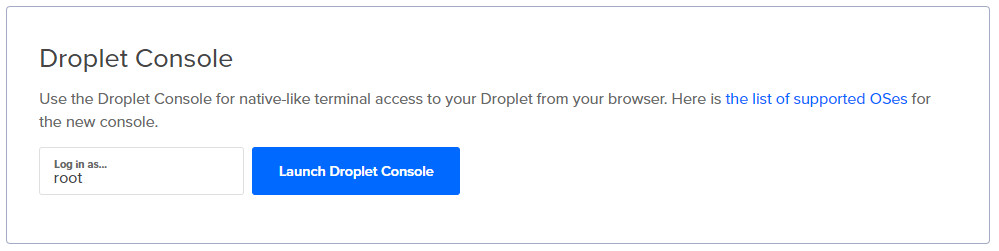
Here, the default login user is “root”, and the password for the user will be entered once the console popup window shows after clicking the “Launch Droplet Console” button. The password to enter is the same one that the user set for “root” at the time of creation of the Droplet.
After logging into the console as root, the user will have full permissions to add files, edit files, run programs, setup a file transferring protocol, etc. We won’t go into the specifics since what a user does inside of their console is out of the bounds of simple Droplet management.
Recovery Console
Next is the Recovery console. In the event that one loses access to their Droplet or has lost data that they are unable to recover in the regular Droplet console, they can open a Recovery console session to attempt to recover access or potentially lost data. To access the Recovery console, simply click the “Launch Recovery Console” button on the access tab page and enter the password for the “root” user in the popup window. The button for the Recovery console looks something like below:
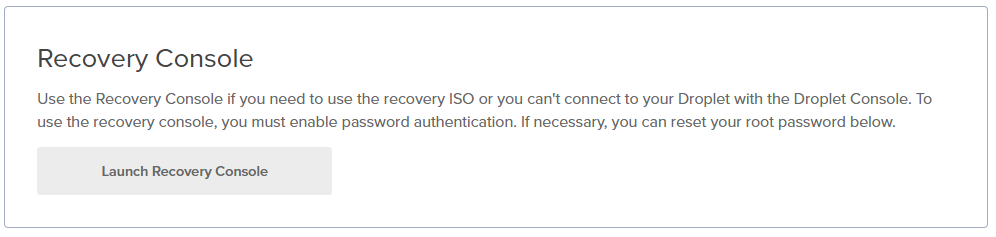
After logging into the Recovery console, the user can select from 6 options available. These options are explained in detail when the user logs in, so there is no need to elaborate on them here.
*Note: The Recovery console is only to be used if familiar with Ubuntu and navigating through an OS using a terminal.
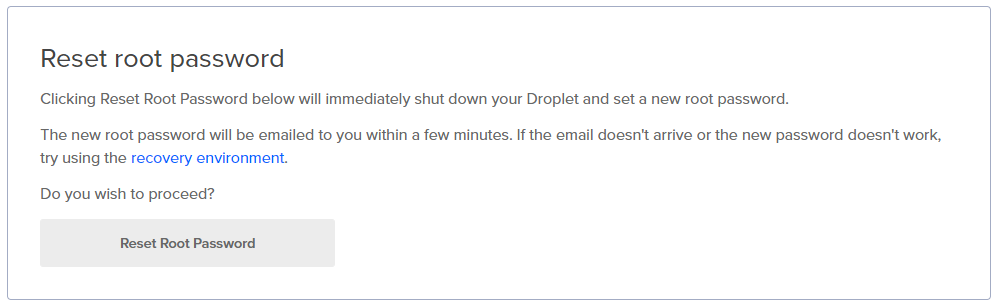
Reset Root Password
The “Reset Root Password” button can be used to reset the password in the event that the user has forgotten their password or has lost access to their Droplet. To do so, simply hit the button shown below and DigitalOcean will prompt accordingly.
Power
The power tab can be used to power off the Droplet completely or to Power Cycle the Droplet. Below more information can be found regarding both functions:
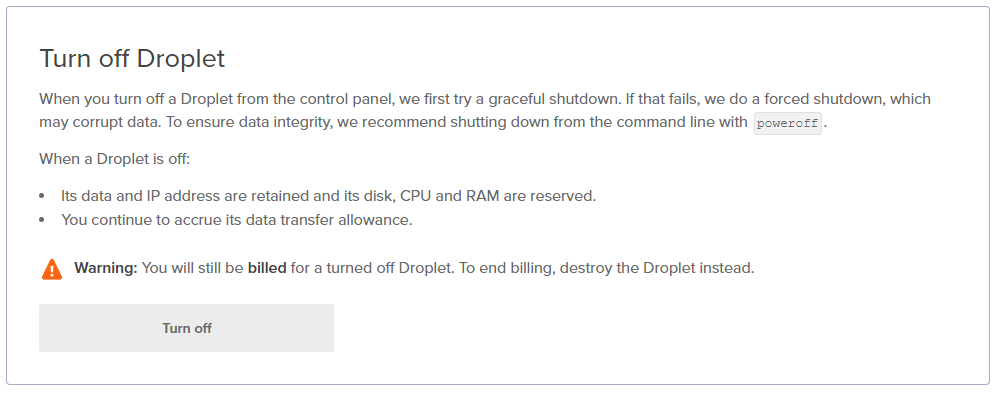
Power Off
The power off function can be used to shutdown the Droplet in the event that maintenence needs to be done on it or the user wants to enable IPv6 addressing for the Droplet. More details on the power off function can be seen in the following image:
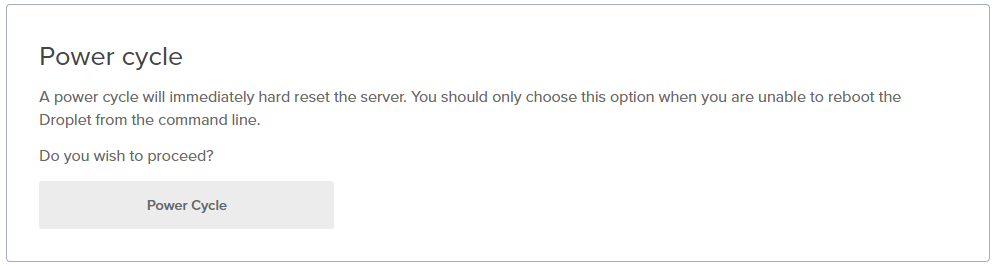
Power Cycle
The power cycle function can be used to do a full restart of the Droplet, powering it off then turning it back on. More details on this can be found in the image below:
Networking
The networking tab is where all options regarding IP addressing and firewalls are located. Below you can find more information regarding each option listed on the page:
Public Network
The public network settings show the public IP addresses and subnets that people can access the Droplet through. In the same section, users can enable or disable public IPv6 addressing if so desired. See the below screenshot:
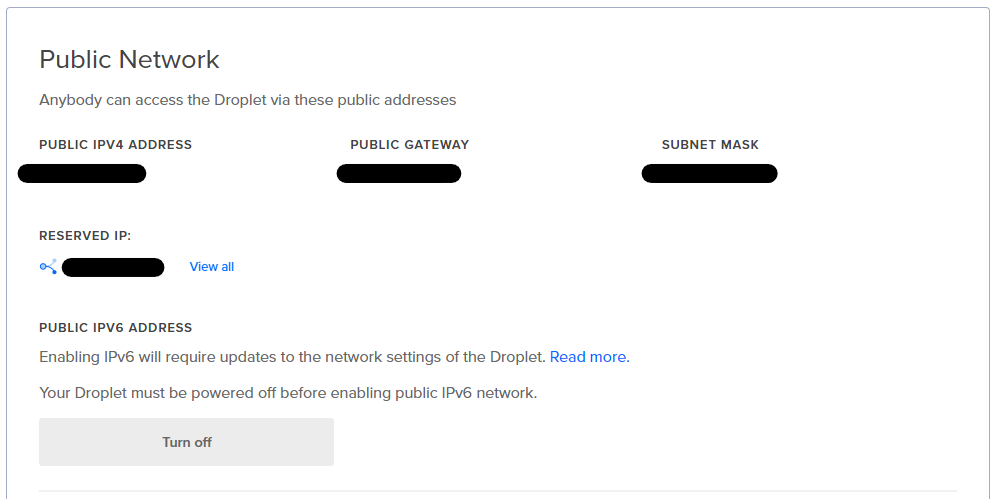
*Note: All IP addresses associated with this Droplet have been crossed out for security purposes.
Private Network
The private network settings list the Droplet’s private IP address and the name and IP of the the Virtual Private Cloud (VPC) network. As shown below, only users that are a part of the same VPC network can connect to the Droplet using the private IP address:
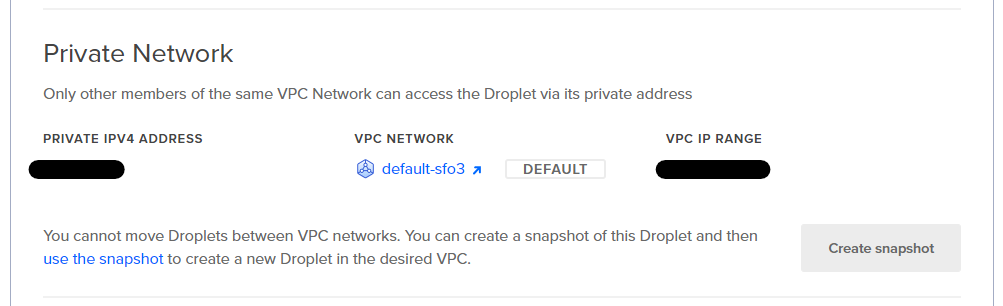
*Note: All IP addresses associated with this Droplet have been crossed out for security purposes.
Firewalls
Below you will find information regarding the firewall settings for the Droplet.
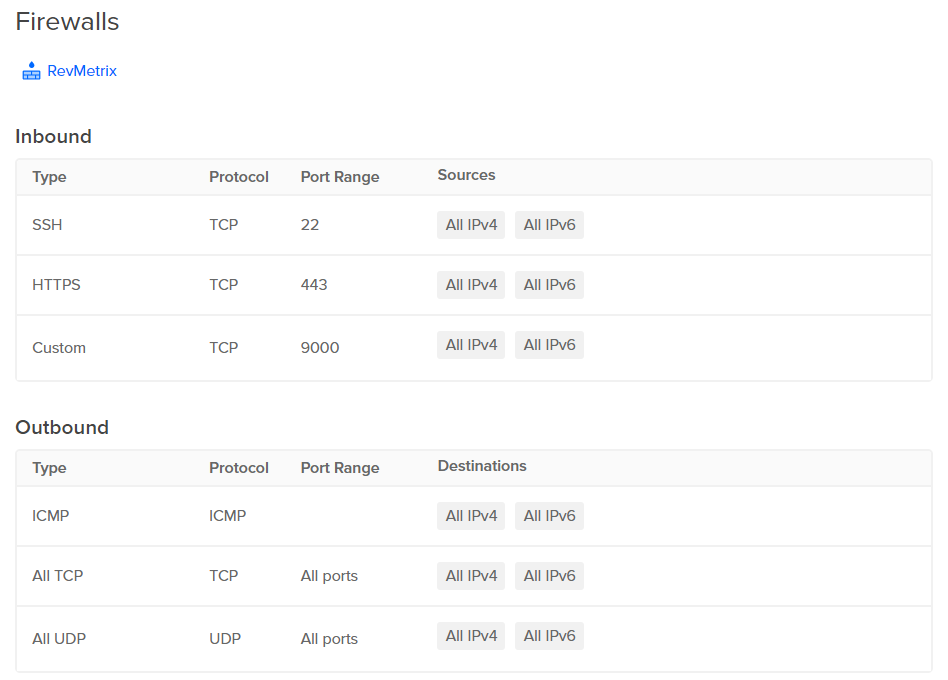
There are two types of firewall rules that can be configured. How one configures their firewalls depends solely on the goal of the user. Below you will find the inbound and outbound rules and what type of connections each firewall handles:
Inbound Firewall:
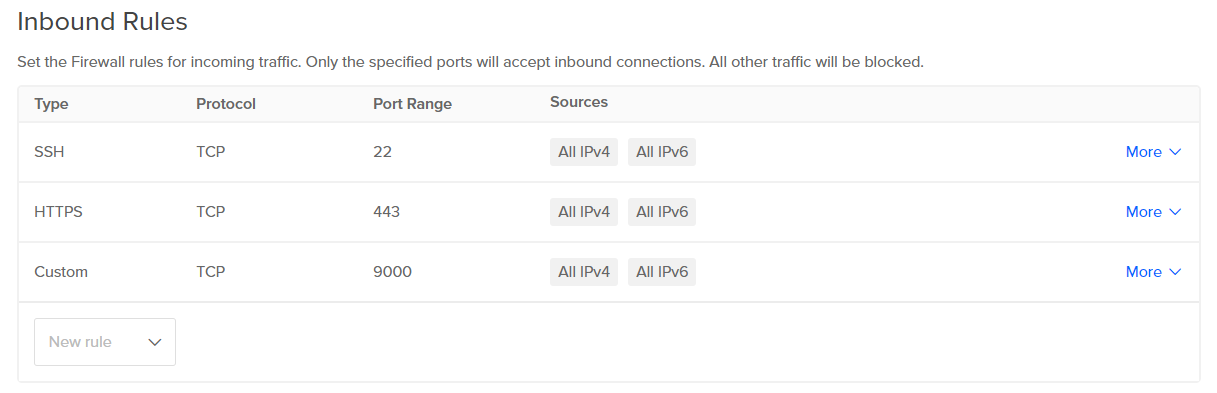
- The inbound firewall handles incoming connections by a multitude of protocols such as HTTPS, SSH, and so on. To specify a port that an application on the Droplet should run on, one would simply create a “Custom” inbound firewall rule that specifies the port of the application to run.
Outbound Firewall:
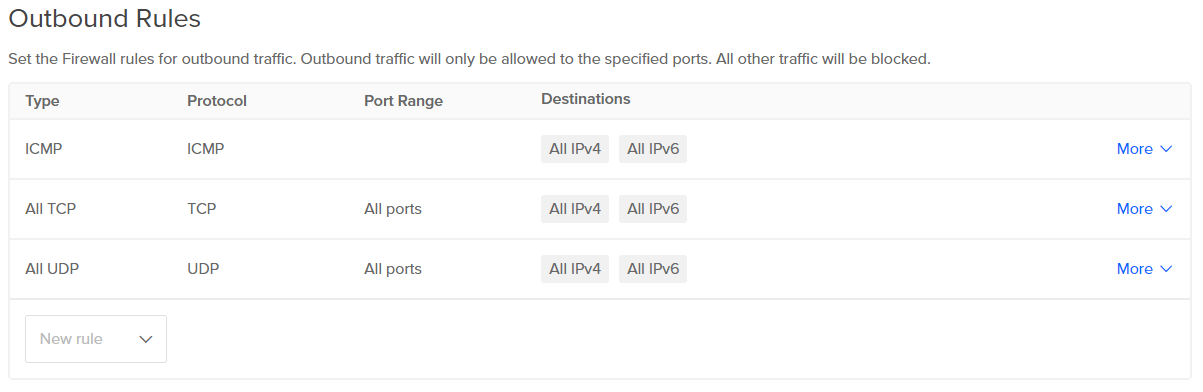
- The outbound firewall handles outgoing traffic from the server different communication protocols such as ICMP, TCP, UDP, and more. These rules allow the user to specify what ports and what destinations traffic from the server is allowed to be sent to.
Snapshots
The snapshots tab is where users are able to create snapshot backups of their Droplet. Though it costs a bit extra to create snapshots, it is good practice to create one in the event that data gets corrupted on the Droplet or the user loses access to it and can not reset their password. Below you can see the details of creating a snapshot and that all you need to do is name the snapshot and hit “Take Live Snapshot”:
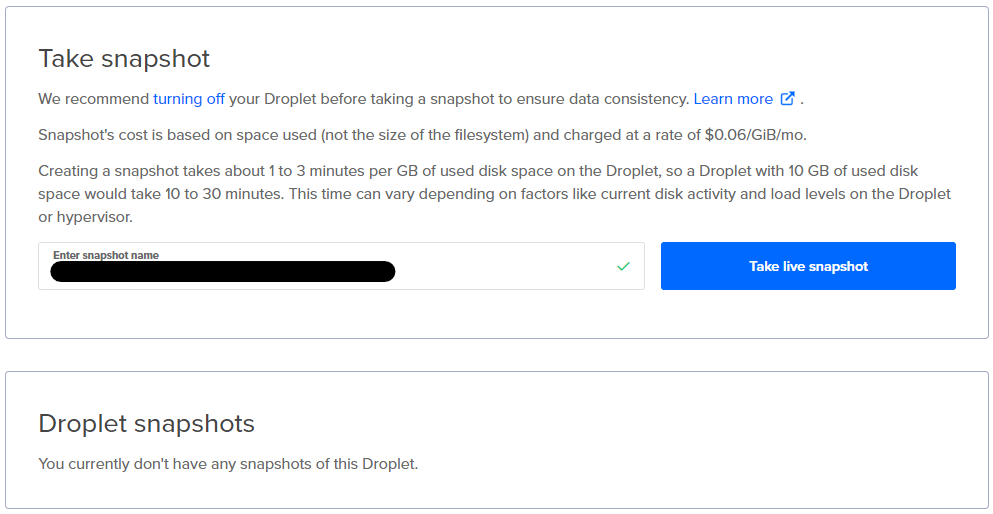
Users can also see previous snapshots taken in the bottom section of the page and if none were made, the output above for that section will be shown.
*Note: The name of the Droplet snapshot has been crossed out for security purposes.
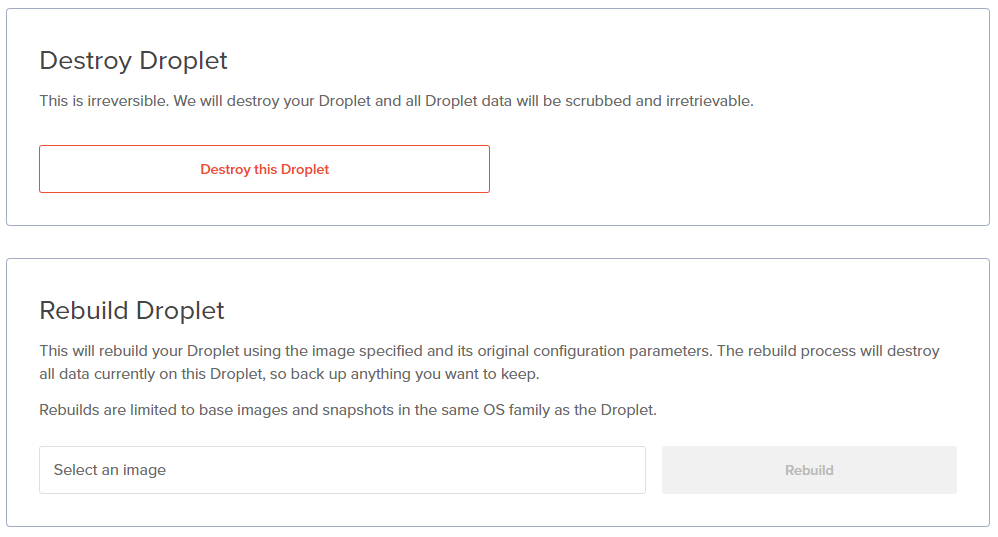
Destroy
The destroy tab can be used to permanently delete the Droplet or rebuild the droplet from a previously taken snapshot (after doing so in the above section). See the below image to get an idea of each function:
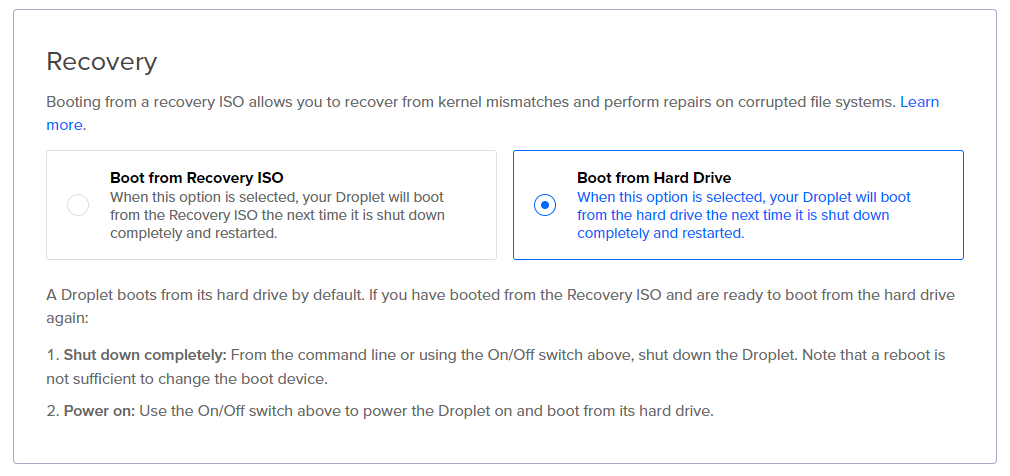
Recovery
The recovery tab is used when someone needs to restore something from the Droplet that they may have accidentally deleted or that has become corrupted. The default setting in this tab is to boot from the Droplet’s hard drive, which is what is happening each time the Droplet is turned on until the option is changed. Changing the option to boot from recovery ISO allows the user to handle different kernel mismatches and attempt to restore any corrupted data, though none of the recovery methods are guaranteed to work in the case of an emergency (deleted privilege folders, renaming of privilege folders, etc.). See below to read more about each option’s function: