Sample Shot Session
Sample shot session
This sample run demonstrates a complete shot workflow from Home through Data View verification.
Example workflow
This guide assumes first-time use and starts from Home.
- Open Shot Mode.
- In the SmartDot Connect Widget, press Scan for SmartDot.
- After scan completes, select a SmartDot that matches a device in the arm.
SI:MU:LA:TE:DD:OTis the simulated SmartDot.- On desktop builds, simulated SmartDot is the available option.
- Configure Spin:
- Start value:
300 - End value:
450
- Start value:
- Configure Angle:
- Start value:
30 - End value:
10
- Start value:
- Configure Tilt:
- Start value:
15 - End value:
10
- Start value:
- Add Spin curve points to match this example:
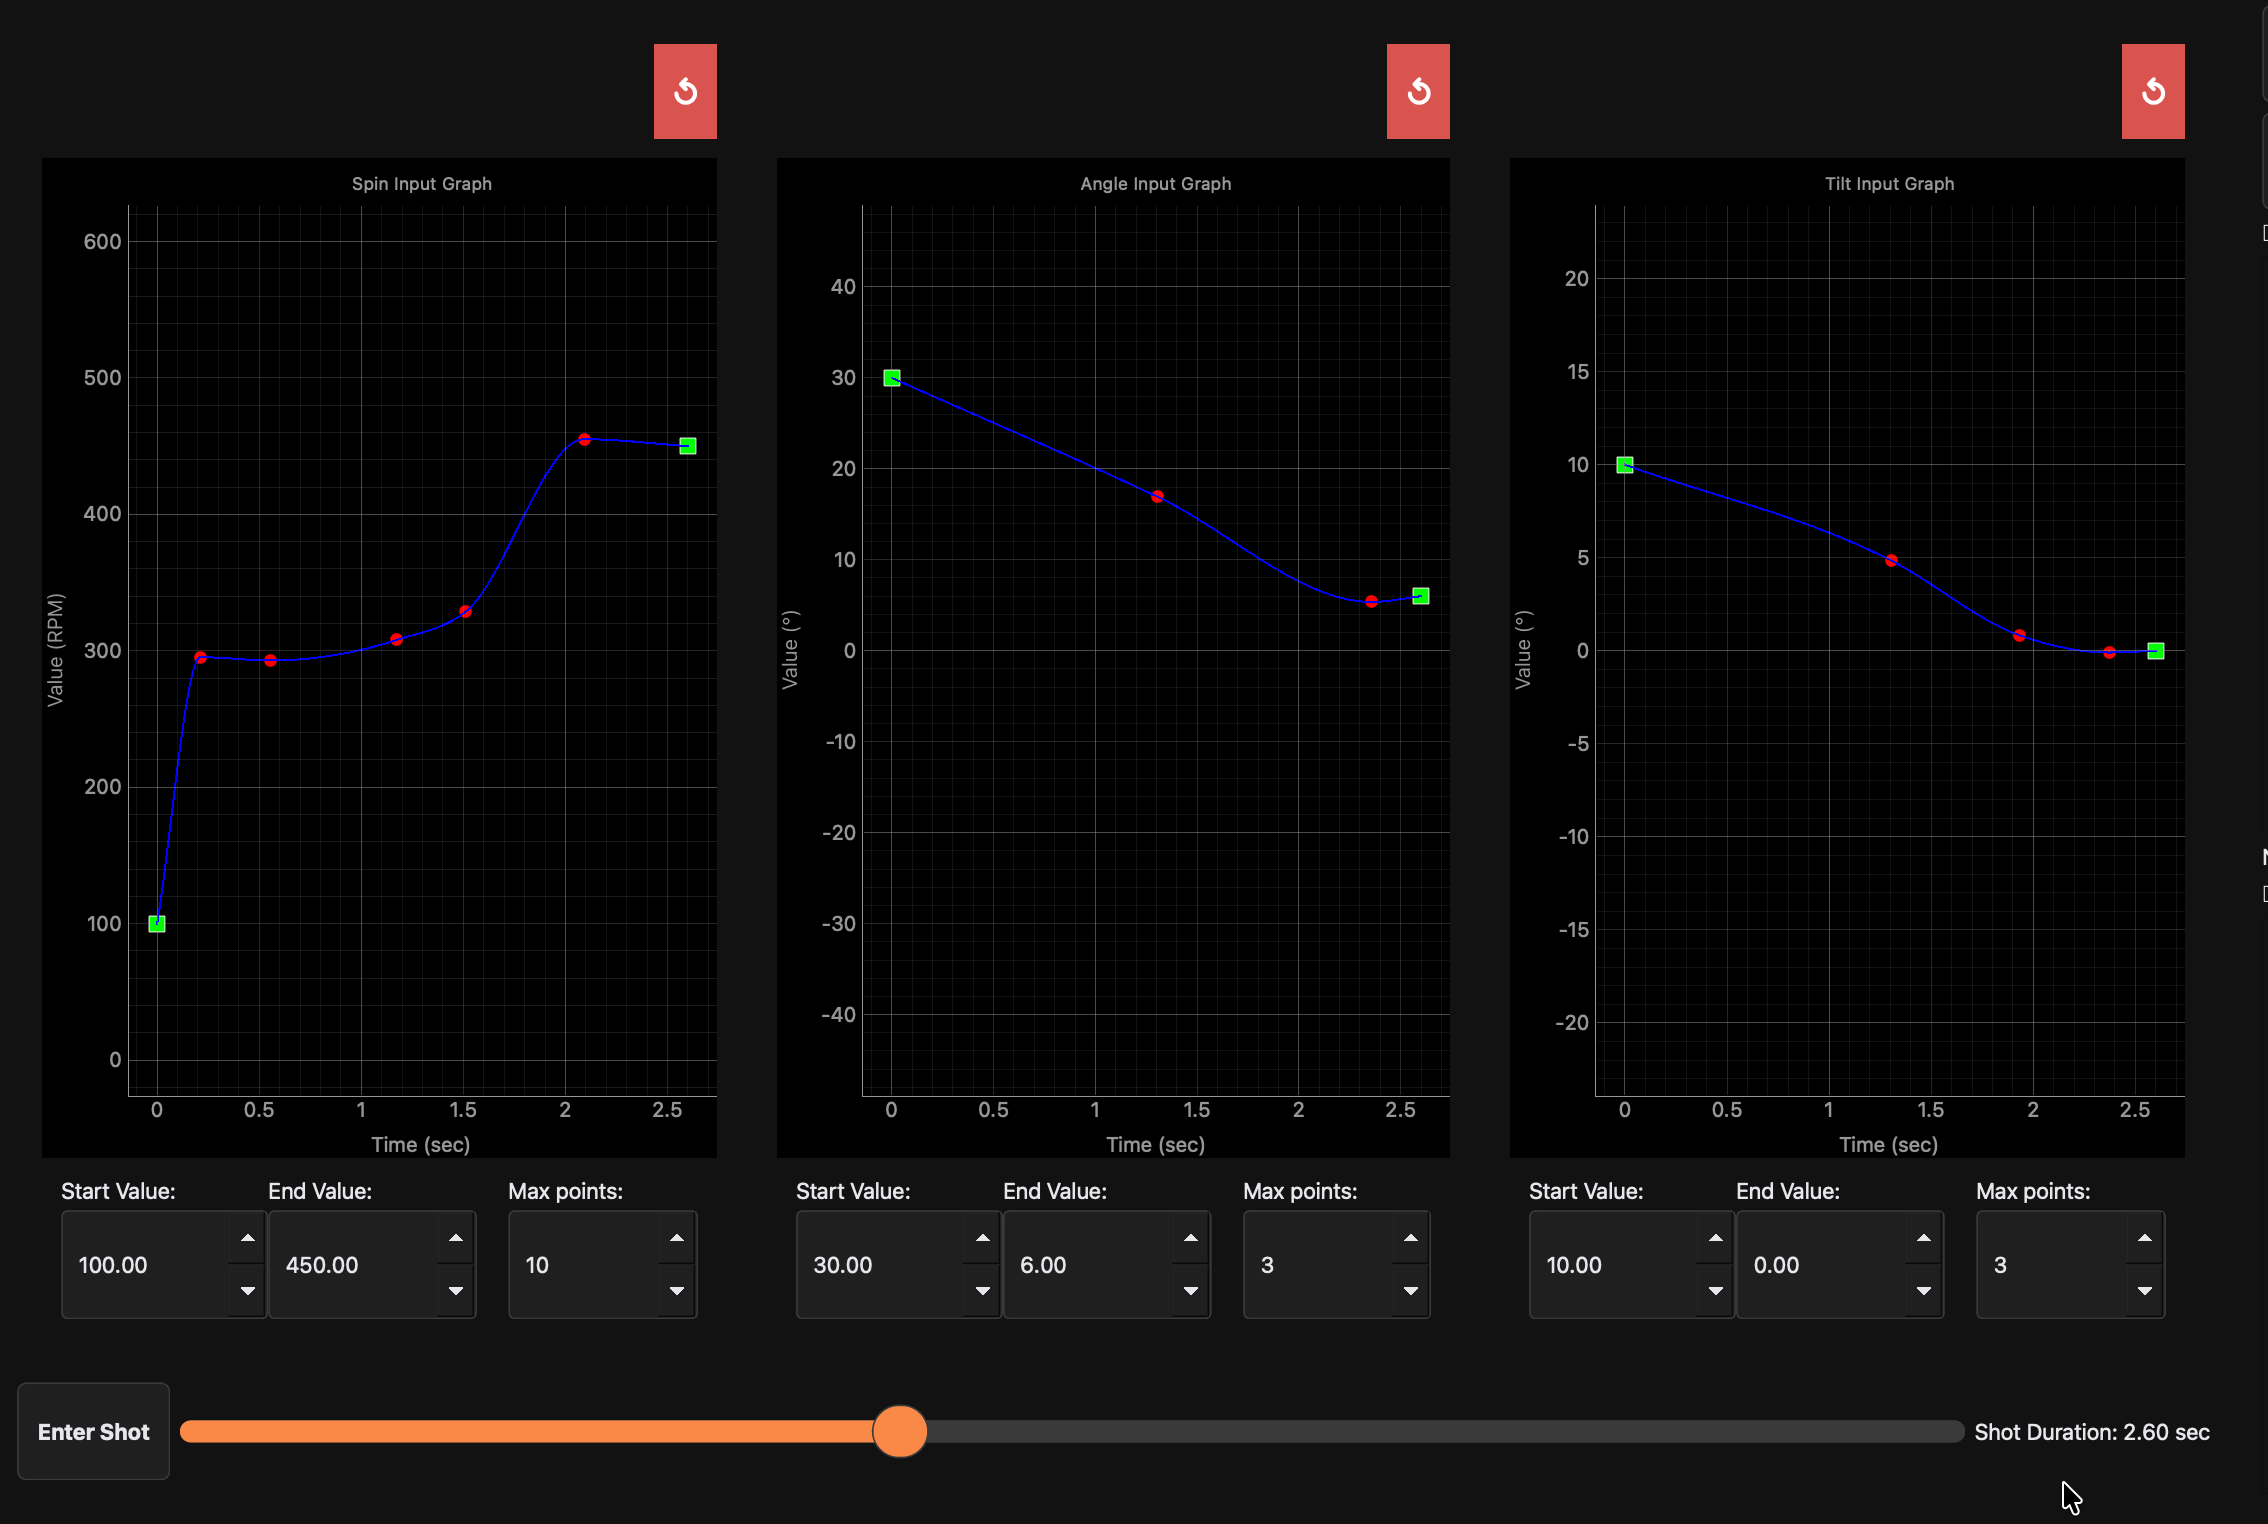
- Set shot duration slider to
2.6seconds. - Press Enter Shot.
- After the shot completes, press Analyze.
- Run analysis actions and review output in Analysis Mode.
- Open wavelet analysis and follow Wavelet Dialog guidance.
- Press Save, enter a session name, and submit.
- Return to Home and open Data View.
- Set end date/time to today and one hour ahead, then press Search.
- Confirm the new shot appears in Data View.
Expected result
- A complete shot session appears in Data View.
- Replay and Analyze actions work for the saved session.
- Instruction points remain available for Edit operations.
Troubleshooting
-
No SmartDot appears after scan
- Re-run scan in SmartDot Connect Widget.
- Confirm SmartDot is powered and within range.
- On desktop builds, use
SI:MU:LA:TE:DD:OT.
-
Shot does not start after pressing Enter Shot
- Confirm SmartDot is connected first.
- Confirm shot inputs and duration are set.
- Return to Shot Mode and retry.
-
Session does not appear in Data View
- Confirm save/submit completed successfully.
- Expand date/time range and press Search again in Data View.
- Verify the session-type filter includes shot sessions.